 by
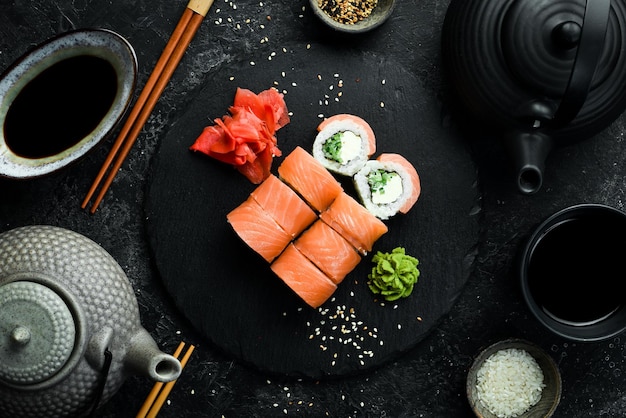
by If you’re a sushi lover looking for a unique twist on traditional sushi, our canned tuna sushi bake recipe is an absolute must-try. Combining the delicious flavors of sushi with the convenience of a baked dish, this recipe will quickly become a favorite in your household. Perfect for family dinners, gatherings, or just a comforting weeknight meal, this sushi bake is about to become a staple in your kitchen.
The Magic of Canned Tuna Sushi Bake
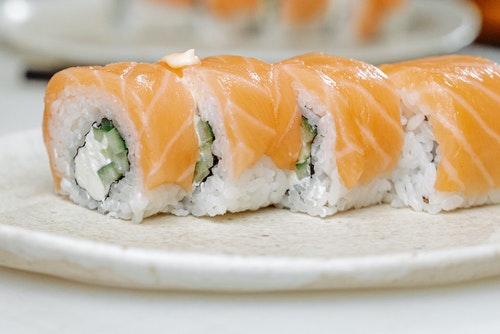
The beauty of the canned tuna sushi bake recipe lies in its simplicity and versatility. Canned tuna adds a savory, protein-packed punch that meshes perfectly with the seasoned rice, rich cream cheese, and tangy sriracha mayo. The bake is then topped with sesame seeds, green onions, and a drizzle of eel sauce, making every bite a delightful blend of flavors and textures.
Ingredients You’ll Need
- 2 cups sushi rice
- 1 can of tuna
- 1/2 cup cream cheese
- 1/4 cup mayonnaise
- 2 tablespoons sriracha sauce
- 1 tablespoon soy sauce
- 1/4 cup unagi (eel) sauce
- 2 tablespoons sesame seeds
- 2 green onions, sliced
- Nori sheets for serving
Step-by-Step Instructions
Before you dive into the recipe, make sure you’ve got all the right kitchen tools on hand. A rice cooker, sushi knife, cutting board, strainer, and sushi making kit will make your cooking experience smoother.
Step 1: Prepare the Rice
Start by cooking your sushi rice according to the package instructions using a rice cooker. Once cooked, let the rice cool slightly before mixing it with the rice seasoning, ensuring an even distribution of flavors.
Step 2: Mix the Tuna Filling
In a large bowl, combine the canned tuna, cream cheese, mayonnaise, sriracha sauce, and soy sauce. Use a fork to mix everything together until well combined, making sure the cream cheese is fully incorporated.
Step 3: Assemble the Bake
Preheat your oven to 350F (175C). In a baking dish, spread a layer of the seasoned sushi rice, pressing it down firmly. Next, evenly spread the tuna mixture over the rice. Drizzle a generous amount of unagi (eel) sauce over the top, followed by a sprinkle of sesame seeds and green onions.
Step 4: Bake It
Place the baking dish in the preheated oven and bake for 20-25 minutes, or until the top is golden and bubbly. Remove from the oven and let it cool for a few minutes before serving.
Step 5: Serve Your Sushi Bake
Cut the sushi bake into portions and serve with nori sheets. Encourage your guests to scoop the sushi bake into the nori sheets, like a sushi taco. Enjoy the rich, creamy flavors and the satisfying crunch of the nori.
Why You’ll Love This Recipe
This canned tuna sushi bake recipe is perfect for all sushi enthusiasts, from beginners to seasoned aficionados. The blend of creamy tuna, savory rice, and crispy nori makes for a mouthwatering dish that’s sure to impress. Plus, it’s incredibly easy to put together, making it an ideal choice for busy weeknights or last-minute gatherings.
Tips for the Perfect Sushi Bake
For the best results, use high-quality sushi rice and ensure it’s cooked just rightnot too mushy or too dry. Adjust the level of sriracha to suit your heat preference. If you’re feeling adventurous, you can experiment with other toppings like avocado slices, tobiko (fish roe), or even shredded nori.
Related Recipes You Might Enjoy
- Hawaiian Roll Sushi
- Volcano Roll Sushi
- Deep-Fried Sushi Roll
- Lobster Roll Sushi
- California Sushi Roll
Care for Your Cookware
After enjoying your delicious canned tuna sushi bake, make sure to properly clean and maintain your kitchen tools for longevity. Check out some top-quality cookware cleaners and cutting board oils to keep your kitchen in top shape.
Final Thoughts
This canned tuna sushi bake recipe combines the beloved elements of sushi with the ease and comfort of a baked dish. It’s perfect for any occasion and sure to be a hit with sushi lovers everywhere. So, gather your ingredients, preheat your oven, and dive into the wonderful world of sushi baking!
As an Amazon Associate, I earn from qualifying purchases.
——————————————————————————————————–
Disclosure: This post contains affiliate links. As an Amazon Associate I earn from qualifying purchases, but there will be no extra charges to you. Thank you for your support!