
 by
by Ultimate Bake Sushi Recipe: A Delicious Twist on Traditional Sushi
Welcome to the exciting world of sushi! In this article, we are diving into a delicious and innovative twist on the classic sushi experience – the bake sushi recipe. If you’re a sushi lover looking to experiment in the kitchen, this recipe is perfect for you. We will walk you through every step to create the perfect baked sushi, so buckle up and get ready for an unforgettable culinary adventure!
Why Bake Sushi?
Baked sushi combines the best elements of traditional sushi with a warm, comforting twist. The delicious flavors of the sushi ingredients meld together beautifully when baked, creating a unique and delightful dining experience. This recipe is also perfect for those who may be hesitant to try raw fish, as baking eliminates any concerns about raw ingredients. Plus, its a great dish to serve at parties or family gatherings – providing a crowd-pleasing alternative to the traditional sushi rolls.
Ingredients for Bake Sushi Recipe
- 2 cups sushi rice (cooked using a Rice Cooker)
- 1 cup rice vinegar
- 1/2 cup sugar
- 1 teaspoon salt
- 200g imitation crab meat, shredded
- 200g shrimp, cooked and chopped
- 1/2 cup mayonnaise
- 2 tablespoons sriracha
- 1 avocado, thinly sliced
- 1 cucumber, julienned
- Nori sheets
- Sesame seeds for garnish
Step-by-Step Instructions
Step 1: Prepare the Sushi Rice
Start by preparing your sushi rice. Rinse the rice thoroughly in a strainer until the water runs clear. Using a Rice Cooker, cook the sushi rice following the package instructions. After the rice is cooked, let it cool slightly and season it with a mixture of rice vinegar, sugar, and salt. Gently fold the vinegar mixture into the rice until it’s evenly distributed.
Step 2: Prepare the Filling
While your rice is cooling, prepare the filling. Mix together the shredded imitation crab meat, cooked shrimp, mayonnaise, and sriracha in a bowl. This will be your flavorful filling mixture for the baked sushi.
Step 3: Assemble the Sushi Bake
Preheat your oven to 375F (190C). In a baking dish, start by spreading a layer of the seasoned sushi rice at the bottom. Press it down firmly to create an even layer. Next, evenly spread the filling mixture on top of the rice layer. Place the sliced avocado and julienned cucumber on top of the filling.
Step 4: Bake the Sushi
Cover the baking dish with aluminum foil and bake in the preheated oven for 20 minutes. After 20 minutes, remove the foil and bake for an additional 5-10 minutes, or until the top is slightly golden and bubbly.
Serving and Enjoyment
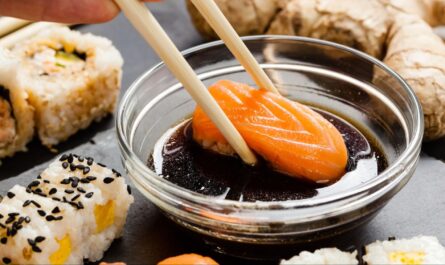
After baking, take the dish out of the oven and let it cool for a few minutes. Cut the baked sushi into squares using a sushi knife and serve each piece on a cutting board. Garnish with sesame seeds and additional nori sheets if desired. You can also serve it with traditional sushi toppings like soy sauce, pickled ginger, and wasabi for an authentic experience. Pair your sushi bake with a refreshing drink, and enjoy your meal!
Cookware and Tools for Bake Sushi
Having the right tools will make the process even smoother:
- Rice Cooker to perfectly cook your sushi rice
- Sushi Knife for precise cutting
- Cutting Board to work with your ingredients
- Strainer to rinse your rice
- Sushi Making Kit for a complete sushi-making experience
Cleaning and Maintenance
After enjoying your baked sushi, its essential to take care of your cookware. Use a cookware cleaner to keep your rice cooker and other tools in pristine condition. Additionally, applying cutting board oil will maintain the quality and longevity of your cutting board.
Conclusion
The baked sushi recipe is a delightful way to experience sushi in a new form. With its warm and comforting flavors, its bound to be a hit at your next gathering. By following our detailed instructions and utilizing the recommended tools, you can master this recipe with ease. Dont forget to check out more exciting sushi recipes on our website:
As an Amazon Associate, I earn from qualifying purchases.
——————————————————————————————————–
Disclosure: This post contains affiliate links. As an Amazon Associate I earn from qualifying purchases, but there will be no extra charges to you. Thank you for your support!