Are you a sushi enthusiast looking to make the perfect sushi rice in a short amount of time? Look no further! This quick sushi rice recipe is designed to help you create delicious, fluffy, and perfectly seasoned sushi rice that will become the star of your sushi rolls. The best part? It won’t take up much of your time, making it an ideal choice for both beginners and seasoned cooks. Whether you’re planning a sushi night with friends or simply craving some homemade sushi, this recipe has got you covered.
Why This Quick Sushi Rice Recipe Stands Out
What sets this quick sushi rice recipe apart from others is its focus on simplicity and efficiency without compromising on flavor and texture. With just a few key ingredients and the right techniques, you can achieve sushi rice that rivals those served in top sushi restaurants. Plus, I’ll be sharing tips and tricks along the way to ensure your sushi rice turns out perfect every time.

Ingredients
Before we dive into the cooking process, let’s take a look at the ingredients you’ll need for this recipe:
- 2 cups of sushi rice
- 2 1/4 cups of water
- 1/2 cup of rice vinegar
- 1/4 cup of sugar
- 1 1/2 teaspoons of salt
Essential Cookware and Tools
Having the right cookware and tools can make a significant difference in the quality of your sushi rice. Here are a few recommendations:
Step-by-Step Instructions for Making Quick Sushi Rice
Let’s get started with the step-by-step process of making our quick sushi rice:
1. Rinse the Sushi Rice
Begin by rinsing the sushi rice thoroughly. Place the rice in a strainer and rinse it under cold water until the water runs clear. This step is crucial for removing excess starch and ensuring the rice doesn’t become too sticky.
2. Cook the Rice
Once the rice is rinsed, transfer it to a rice cooker. Add 2 1/4 cups of water to the rice and let it soak for about 30 minutes. After soaking, turn on the rice cooker and let it do its magic. If you don’t own a rice cooker, you can cook the rice on the stovetop as well.
3. Prepare the Rice Vinegar Mixture
While the rice is cooking, prepare the seasoning mixture. In a small saucepan, combine 1/2 cup of rice vinegar, 1/4 cup of sugar, and 1 1/2 teaspoons of salt. Heat the mixture over low heat until the sugar and salt dissolve completely. Be careful not to let it boil.
4. Season the Rice
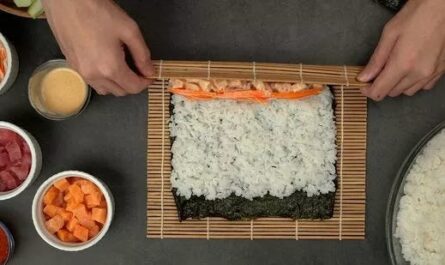
Once the rice is cooked, transfer it to a large cutting board or sushi Oke. Pour the vinegar mixture over the rice and gently fold it in using a sushi knife. The vinegar mixture should be evenly distributed throughout the rice. This process is known as ‘cutting’ the rice and is aimed at incorporating air to give the rice a shiny and fluffy texture.
5. Cool the Rice
Allow the sushi rice to cool to room temperature. You can use a fan to speed up the cooling process while continuing to fold the rice gently. The rice should be sticky yet separate easily, making it perfect for sushi rolls.
Mastering the Art of Sushi Making
Once you’ve got your perfectly prepared sushi rice, the possibilities are endless. If you’re looking for some sushi-making inspiration, be sure to check out some of our other popular recipes such as the Hawaiian Roll, Volcano Roll, and Deep-Fried Sushi Roll. These recipes will take your sushi night to the next level, showcasing your newly acquired sushi rice-making skills.
Cleaning and Maintenance Tips
After enjoying your sushi feast, it’s important to clean and maintain your cookware properly. To ensure your cooking tools last for a long time, consider using a Cookware Cleaner and Cutting Board Oil. These products will help keep your kitchen essentials in top condition for future sushi-making adventures. For more detailed cleaning guides, visit this helpful article on cleaning cookware.
Now that you’re equipped with the secrets to mastering quick sushi rice, it’s time to roll up your sleeves and get cooking. Enjoy the process, and don’t forget to have fun experimenting with different sushi combinations!
As an Amazon Associate, I earn from qualifying purchases.
——————————————————————————————————–
Disclosure: This post contains affiliate links. As an Amazon Associate I earn from qualifying purchases, but there will be no extra charges to you. Thank you for your support!

