 by
by The Ultimate Guide to Making Avocado Sushi Recipe at Home
Theres something uniquely delightful about an avocado sushi recipe that makes it a favorite among sushi enthusiasts. Not only is it healthy and nutritious, but it also has a rich, creamy flavor that perfectly complements the sushi rice and seaweed. In this comprehensive guide, we will dive deep into everything you need to know to make the perfect avocado sushi at home. From choosing the best avocados and sushi rice to mastering the art of rolling sushi, weve got you covered.
Why Make Sushi at Home?
Making sushi at home is not just about replicating the dishes you love from your favorite sushi restaurant. It’s about the joy of creation, the flexibility to customize your rolls, and the opportunity to control the quality and freshness of your ingredients. Plus, homemade sushi is often much more economical than dining out. Whether youre a sushi lover wanting to enjoy a fun cooking project or someone looking to impress your guests with your culinary skills, this avocado sushi recipe is perfect for you.
Essential Ingredients for Avocado Sushi
To create the perfect avocado sushi at home, you’ll need a few essential ingredients. Heres a list of what you’ll need:
Ingredients
- 2 cups sushi rice
- 2 1/2 cups water
- 1/4 cup rice vinegar
- 1 tablespoon sugar
- 1 teaspoon salt
- 2 medium ripe avocados
- Nori seaweed sheets
- Soy sauce
- Pickled ginger
- Wasabi
For a perfect outcome, it is essential to use fresh and high-quality ingredients. Make sure to use ripe avocados with a slight yield to gentle pressure, as these will provide the creamy texture we want. Sushi rice is crucial since it’s sticky enough to hold the roll together. Also, don’t forget the nori seaweed sheets; they add the necessary structure and a slight ocean taste to your sushi rolls.

Necessary Cookware and Tools
While sushi might seem complex, the tools needed are relatively simple. Heres what youll need:
Using these tools will make your sushi-making experience much easier. A rice cooker ensures perfectly cooked rice every time, while a sushi knife is designed to cleanly slice through your rolls without squishing the rice. A reliable cutting board is essential for preparing your ingredients. A strainer will be handy for rinsing the rice, and a basic sushi making kit often includes a bamboo mat to help you roll the sushi tightly and evenly.
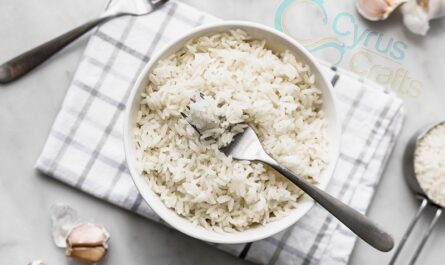
Preparing the Sushi Rice
Step 1: Rinse the Rice
The first step in our avocado sushi recipe is preparing the sushi rice. Begin by measuring two cups of sushi rice and placing it in a bowl. Fill the bowl with cold water and gently stir the rice with your hand. Pour off the cloudy water and repeat the rinsing process until the water runs clear. This step removes excess starch from the rice, ensuring a better texture when cooked.
Step 2: Cook the Rice
Once the rice is rinsed, transfer it to the rice cooker. Add 2 1/2 cups of water and let the rice soak for about 30 minutes before starting the cooker. This resting period allows the grains to absorb water, leading to a more even cook. If you don’t have a rice cooker, you can use a saucepan. Bring the rice and water to a boil, then reduce the heat to low, cover, and simmer for 18-20 minutes.
Step 3: Season the Rice
While the rice is cooking, prepare the seasoning by mixing 1/4 cup of rice vinegar, 1 tablespoon of sugar, and 1 teaspoon of salt in a small saucepan. Heat the mixture over low heat until the sugar dissolves completely, but do not let it boil. Once the rice is done, transfer it to a large bowl and drizzle the vinegar mixture over it. Gently fold the rice with a spatula to incorporate the seasoning while fanning it to cool. This process gives sushi rice its unique flavor and sticky texture.
Preparing the Avocado
Step 1: Select and Cut the Avocado
For this avocado sushi recipe, youll need ripe but firm avocados. Avoid overly soft ones as they can be too mushy for slicing. Use a sharp knife to cut the avocado in half, remove the pit, and gently scoop out the flesh. To make slicing easier, you can sprinkle some lemon juice over the avocado to prevent browning.
Step 2: Slice the Avocado
Place the avocado halves on a cutting board and slice them into 1/4-inch thick strips. Consistent slices will make your sushi rolls look more professional and ensure even distribution of flavors. For more tips on how to handle avocados in sushi, you can read this [comprehensive guide](https://sushiandrice.com/sushi-rice-recipe-with-jasmine-rice-2) from our collection.
Assembling the Sushi Rolls
Step 1: Prepare Your Workstation
Set up a clean, dry workstation. Place your cutting board, sushi knife, bamboo rolling mat, and a small bowl of water mixed with a little rice vinegar (this will be used to keep your fingers wet and prevent the rice from sticking).
Step 2: Lay the Nori and Rice
Place a sheet of nori on your bamboo mat, shiny side down. Wet your fingers and spread a thin, even layer of the seasoned sushi rice over the nori, leaving a 1-inch border at the top edge. Press the rice down gently to ensure it sticks to the nori but doesn’t become too compact. This step is critical in our avocado sushi recipe to ensure all components stick together well.
Step 3: Add the Avocado
Arrange the avocado slices horizontally along the bottom third of the rice. Be careful not to overfill, as this can make the rolling process more challenging. Feel free to add other ingredients like cucumber sticks or imitation crabmeat if you prefer, but for the purpose of this recipe, were keeping it simple and focusing on the avocado.
Step 4: Roll the Sushi
Lift the edge of the bamboo mat closest to you and begin to roll it away from you, pressing gently but firmly to keep the roll tight. As you roll, use the mat to shape and compress the sushi. Continue rolling until you reach the border of nori without rice. To seal the roll, dab a little water from the rice vinegar bowl along the edge of the nori and press it into the roll.
Step 5: Cut the Sushi
Using your sushi knife, slice the roll into 6-8 even pieces. For clean cuts, wet the knife blade with the rice vinegar water before each slice. Steps like these are crucial for achieving professional-quality sushi at home, and our avocado sushi recipe is no exception.
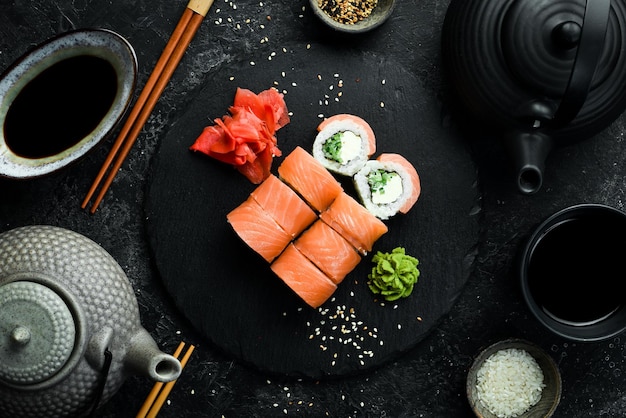
Serving Suggestions
Arrange your avocado sushi pieces on a serving platter. Serve with soy sauce, pickled ginger, and a small amount of wasabi. Sushi is best enjoyed fresh, so make sure to serve it as soon as its made. If youre hosting a sushi night, you could explore other accompanying dishes from our extensive collection, like this delicious [volcano roll](https://sushiandrice.com/volcano-roll-sushi-recipe/) or a refreshing [lobster roll](https://sushiandrice.com/lobster-roll-sushi-recipe/).
Cleanup Tips
Once youve enjoyed your homemade sushi, its time to clean up. Here are some tips for maintaining your sushi tools:
Cleaning Essentials
After cooking, immediately rinse your rice cooker and other tools to prevent rice from hardening. Use a cookware cleaner to keep your sushi knife and cooking surfaces in top condition. Applying a layer of cutting board oil to your wooden utensils and cutting board will prolong their lifespan and keep them looking new.
Conclusion
Making sushi at home can be a rewarding and enjoyable experience. By following this comprehensive avocado sushi recipe, youll be able to create delicious, visually appealing sushi rolls that rival those from your favorite restaurant. Remember to take your time, practice your rolling technique, and most importantly, have fun with the process.
For more amazing sushi recipes, tips, and tricks, check out our other articles on deep-fried rolls and perfect sushi rice with jasmine rice. Enjoy your sushi-making adventure!
As an Amazon Associate, I earn from qualifying purchases.