by
by Welcome to the world of sushi! If you have ever wanted to make your homemade sushi recipe but felt overwhelmed by the process, this comprehensive guide is just for you. Sushi making is an art form that can be both therapeutic and rewarding. Our step-by-step guide will take you through everything you need to know, from selecting the right ingredients to mastering the perfect roll. So, let’s dive into the fascinating world of sushi and unleash your inner sushi chef!

Why Make Sushi at Home?
Creating your homemade sushi recipe is not only a fun and creative activity, but it also offers a healthy and delicious alternative to takeout. By preparing sushi at home, you have complete control over the quality of ingredients, allowing you to use the freshest seafood and organic vegetables. Additionally, you can customize your rolls to suit your taste preferences and dietary needs. Whether you are hosting a sushi night with friends or enjoying a solo culinary adventure, making sushi at home ensures a memorable and enjoyable experience.

Essential Tools for Sushi Making
Before you embark on your sushi-making journey, it’s important to gather the necessary tools. Having the right equipment will make the process smoother and more enjoyable. Here are some essential tools you will need:

Ingredients for Homemade Sushi
The key to a delicious homemade sushi recipe lies in using high-quality ingredients. Freshness is paramount when it comes to sushi, so make sure to source the best ingredients available. Here’s a list of basic ingredients you’ll need:
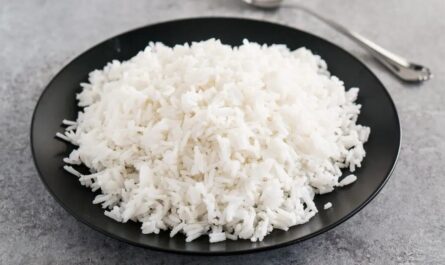
- Sushi Rice: Short-grain sushi rice is essential for making sushi. It has a sticky texture that helps the rice hold together in the rolls.
- Rice Vinegar: Rice vinegar is mixed with sugar and salt to season the sushi rice, giving it a delicate flavor and the right amount of stickiness.
- Nori: Nori is a type of seaweed used to wrap sushi rolls. Look for high-quality nori sheets for the best taste and texture.
- Fresh Fish: Opt for sushi-grade fish, such as tuna, salmon, or yellowtail. If you’re not comfortable using raw fish, you can use cooked seafood options like shrimp or imitation crab.
- Vegetables: Cucumbers, avocado, carrots, and bell peppers are popular choices for sushi fillings. Be creative and add your favorite vegetables to your rolls.
- Soy Sauce and Wasabi: Soy sauce and wasabi are essential condiments for sushi. They add a burst of flavor and complement the taste of the rolls.
For more ideas on choosing the best fish for your sushi, check out this excellent guide on our blog.

Step-by-Step Guide to Making Sushi
Now that we have our ingredients and tools ready, let’s dive into the step-by-step process of making sushi at home. Each step is crucial for achieving the perfect homemade sushi recipe, so take your time and enjoy the process.
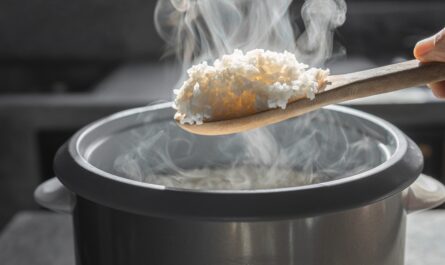
1. Cooking the Sushi Rice
Cooking sushi rice is the foundation of any great sushi recipe. Follow these steps to prepare the perfect sushi rice:
- Rinse the Rice: Measure the desired amount of sushi rice and rinse it thoroughly under cold water using a strainer. This step removes excess starch, resulting in fluffy rice.
- Cook the Rice: Place the rinsed rice in a rice cooker and add the appropriate amount of water. Follow the instructions of your rice cooker for cooking time. If you don’t have a rice cooker, you can use a stovetop method.
- Season the Rice: Once the rice is cooked, transfer it to a large bowl. In a separate bowl, mix rice vinegar, sugar, and salt until dissolved. Pour this mixture over the rice and gently fold it using a rice paddle to evenly coat the grains. Let the rice cool to room temperature.
For a detailed guide on cooking sushi rice, refer to this article on our blog.
2. Preparing the Ingredients
While the sushi rice is cooling, take this time to prepare the other ingredients. Clean and cut the vegetables into thin strips, and slice the fish into thin, even pieces. Having everything prepped and ready will make the assembly process much smoother.
3. Rolling the Sushi
Rolling sushi is where the magic happens! Follow these steps to roll the perfect sushi:
- Place the Nori: Lay a sheet of nori, shiny side down, on a bamboo rolling mat from your sushi making kit.
- Spread the Rice: Wet your hands with water to prevent sticking, then spread a thin, even layer of sushi rice over the nori sheet, leaving a small border at the top.
- Add Fillings: Arrange your desired fillings (fish, vegetables, etc.) in a line across the center of the rice.
- Roll the Sushi: Using the bamboo mat, carefully lift the edge of the nori closest to you and roll it over the fillings, applying gentle pressure. Continue rolling until you reach the top border of the nori.
- Seal the Roll: Wet the top border of the nori with water to seal the roll. Use the bamboo mat to shape and tighten the roll as needed.
4. Slicing the Sushi Rolls
Once the rolls are assembled, it’s time to slice them into individual pieces:
- Use a Sharp Knife: A sharp sushi knife is essential for clean cuts. Wet the blade with water to prevent sticking.
- Cut Evenly: Slice the roll into bite-sized pieces, using a gentle sawing motion.
- Clean the Knife: Wipe the knife with a damp cloth between cuts to ensure each piece is cleanly sliced.
Tips for Perfecting Your Homemade Sushi
While making sushi at home can be a delightful experience, it may take some practice to achieve perfection. Here are some tips to help you along the way:
- Practice Patience: Sushi making is an art that requires patience. Take your time with each step and enjoy the process.
- Keep Your Hands Wet: Wetting your hands with water prevents the rice from sticking to your fingers while spreading it on the nori.
- Use Fresh Ingredients: Freshness is key to delicious sushi. Always choose the freshest fish and vegetables available.
- Experiment with Flavors: Don’t be afraid to experiment with different fillings and combinations. Sushi allows for endless creativity!
Serving and Enjoying Your Homemade Sushi
Presentation is an important aspect of sushi. Arrange your beautifully sliced rolls on a platter and serve with soy sauce, wasabi, and pickled ginger. For an added touch, garnish with sesame seeds or sliced green onions.
Cleaning and Maintaining Your Sushi Making Tools
Proper cleaning and maintenance of your sushi-making tools ensure they last for years. Here are some tips:
- Rice Cooker: Clean your rice cooker thoroughly after each use. Remove any stuck-on rice and wipe down the interior.
- Sushi Knife: Hand wash your sushi knife with warm soapy water and dry it immediately. Avoid putting it in the dishwasher.
- Cutting Board: Clean your cutting board with warm, soapy water. Periodically apply cutting board oil to keep it in top condition.
- Sushi Making Kit: Wash all components of your sushi making kit by hand and let them air dry completely before storing.
For more tips on maintaining your kitchen tools, visit this resource.
As an Amazon Associate, I earn from qualifying purchases.