 by
by If you’ve ever been enchanted by the delightful aromas wafting from a street vendor in Indonesia, or if you simply love the combination of savory **indonesian fried rice** flavors, then this **indonesian fried rice recipe** is just what you need to bring authentic Asian cuisine into your kitchen. This dish is not only a staple in Indonesian households, but it also serves as a fantastic introduction to the rich and diverse culinary landscape of Indonesia. Its deeply satisfying flavors and the flexibility to adapt with your favorite ingredients make it a perfect meal for any occasion, from family dinners to warming up on chilly nights. So lets dive in!

Ingredients Required
- 4 cups of cooked and cooled **white rice** (preferably a day old)
- 2 tablespoons of vegetable oil
- 1 medium onion, finely chopped
- 4 cloves of garlic, minced
- 2 large eggs
- 1 cup of mixed vegetables (like peas, carrots, and corn)
- 2 tablespoons of soy sauce
- 1 tablespoon of sweet soy sauce (kecap manis)
- Salt and pepper to taste
- Fresh chopped green onions for garnish
- Optional: chili paste or fresh chilies for heat
Essential Cookware
Preparing the perfect **indonesian fried rice** requires the right tools in your kitchen. Heres what youll need:
- Rice Cooker – This is essential for achieving the perfect fluffy rice. Using a rice cooker ensures that your rice is cooked to perfection, helping to avoid mushy rice which can ruin your fried rice.
- Knife – A sharp knife is crucial for chopping vegetables evenly. A well-prepared ingredient lineup makes the cooking process much smoother.
- Cutting Board – A sturdy cutting board provides a safe surface for all your chopping and dicing.
Cooking Method
Now, lets bring this **indonesian fried rice recipe** to life! Follow these step-by-step instructions to whip up a delightful dish:
Step 1: Preparation
The first step to creating your **indonesian fried rice** is to make sure your rice is prepped correctly. If you’re using leftover rice, ensure it is cooled and ideally, refrigerate it overnight. This helps to firm up the grains, making them less likely to clump together when frying. If you’re cooking rice fresh, its important to allow it to cool before proceeding.
Step 2: Stir-Frying the Aromatics
Heat the **vegetable oil** in a large skillet or wok over medium-high heat. Once the oil is hot, add the finely chopped **onion** and saut until it turns translucent. Next, add the minced **garlic** and stir until fragrant, ensuring it doesnt burn, which would turn it bitter. This combination creates a fragrant base that is the heart of any great fried rice.
Step 3: Adding the Eggs
Push the aromatic mixture to one side of the pan, creating space for the eggs. Crack the eggs into that space and scramble them quickly until fully cooked. This method not only ensures that the eggs remain fluffy but also distributes their flavor throughout the fried rice.
Step 4: Incorporating the Vegetables
After the eggs are cooked, add the mixed vegetables to the pan. Saut them for a few minutes until they are tender but still vibrant in color. Feel free to customize this step with your favorite vegetables. The beauty of **indonesian fried rice** lies in its versatility, making it a great way to use up leftover vegetables from your fridge.
Step 5: The Star of the Show – The Rice
Here comes the star of your dish: the cooked rice! Add the chilled rice to the pan and mix well, ensuring that every grain gets an even coating of the aromatic mixture. Use a spatula to break up any clumps, whereas the individual grains should be loose and fluffy. Its essential to stir well, allowing the rice to absorb those lovely flavors.
Step 6: Seasoning to Perfection
Season the rice mixture with **soy sauce** and **sweet soy sauce (kecap manis)**, stirring to combine until the rice is evenly coated and takes on a lovely golden hue. Adjust the seasoning with **salt and pepper** according to your taste. If youre a fan of heat, dont hesitate to add some chili paste or fresh chilies at this stage. Allow everything to cook together for another couple of minutes, letting those flavors meld beautifully.
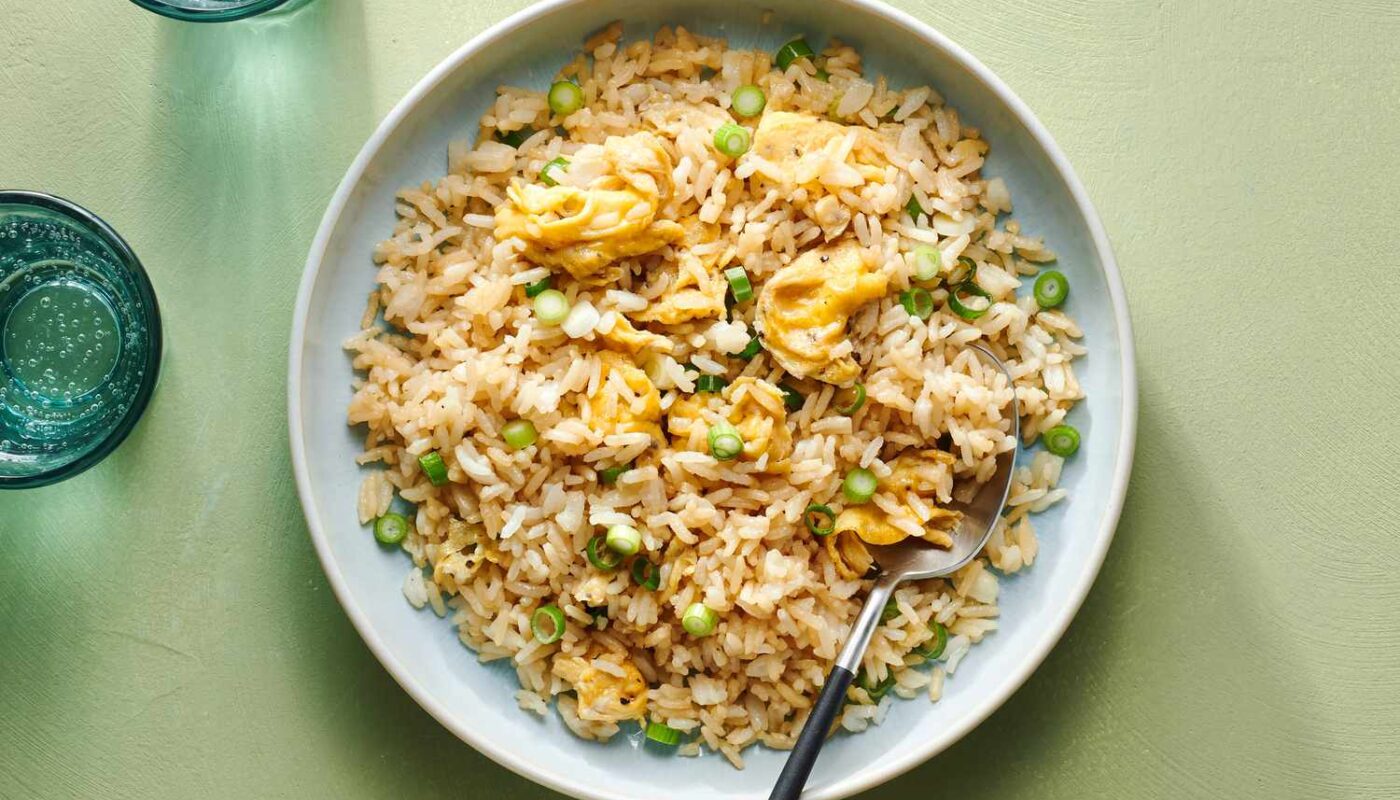
Step 7: Garnishing and Serving
Once youre satisfied with the taste, its time to plate! Transfer your beautifully vibrant **indonesian fried rice** to a serving dish and sprinkle with fresh chopped green onions, giving it a beautiful pop of color and flavor. This dish is best served hot, perhaps with a side of crispy fried chicken or a fresh cucumber salad to cut through the richness of the fried rice.
Cleanup Tips for Your Cookware
After enjoying your delicious meal, its important to ensure your cooking tools are well taken care of. Use a trusted Cookware Cleaner for your pots and pans to guarantee they continue to perform well for your next culinary adventure. Also, consider using a Cutting Board Conditioner to maintain the longevity of your cutting board and keep it looking new.
Why You Must Try This Recipe
Indonesian fried rice is more than just a dish; it is a symbol of Indonesian culture that embodies a blend of flavors, textures, and aromas. It allows for creativity in the kitchen, encouraging you to use what you have at hand while respecting the rich traditions of Indonesian cuisine. Beyond enjoyment, sharing this meal with friends and family can create unforgettable memories over a hearty meal that brings everyone together.
Conclusion
Now that youve got the blueprint for a delicious **indonesian fried rice recipe**, theres nothing stopping you from creating this delightful meal in the comfort of your own home. Your kitchen will soon be filled with the enticing aromas that mirror the vibrant streets of Indonesia. So gather your ingredients, put on your favorite apron, and get ready to impress your family and friends with your newfound culinary skills. Remember, practice makes perfect, so dont hesitate to experiment with flavors and personalize this recipe to suit your preferences!
As an Amazon Associate, I earn from qualifying purchases.