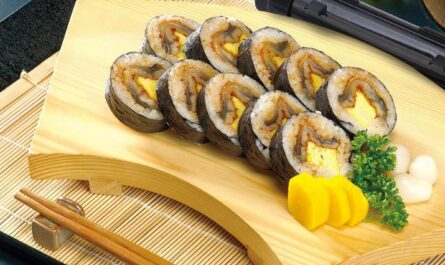
Sushi lovers, rejoice! Are you ready to take your sushi-making skills to the next level with perfectly cooked rice? Learning how to make non-stick pot sushi rice can transform your sushi experience. By using the right techniques and tools, you can achieve the ideal texture and flavor that will complement any sushi dish you create.
The secret to delicious sushi lies in the rice. With a non-stick pot, you can easily prepare sushi rice at home that rivals that of your favorite sushi restaurant. Whether you’re a novice or a seasoned sushi enthusiast, understanding the nuances of cooking sushi rice in a non-stick pot is essential.

Why Choose a Non-Stick Pot?
Using a non-stick pot for cooking sushi rice offers several advantages. The non-stick coating ensures that the rice doesn’t stick to the pot, making it easier to clean and reducing the risk of burning. With a non-stick pot, you can focus on achieving the perfect rice texture without worrying about it sticking to the bottom.
What Makes Sushi Rice Special?
Sushi rice is distinct from other types of rice due to its short-grain nature and sticky texture. This stickiness is essential for forming the rice into sushi rolls or nigiri. The right balance of vinegar, sugar, and salt further enhances the flavor of the rice, making it the perfect base for your sushi creations.
Preparing Sushi Rice in a Non-Stick Pot
Ingredients You’ll Need
- 2 cups short-grain white rice
- 2 cups water
- 1/4 cup rice vinegar
- 2 tablespoons sugar
- 1 tablespoon salt
Step-by-Step Instructions
1. Rinse the Rice: Rinse the rice under cold water until the water runs clear. This removes excess starch and prevents the rice from becoming too sticky.
2. Soak the Rice: Allow the rice to soak in water for about 30 minutes. This step helps the rice absorb water evenly and cook properly.
3. Cook the Rice: Transfer the rinsed and soaked rice to a non-stick pot. Add 2 cups of water and cover the pot with a lid. Bring the water to a boil over medium heat.
4. Simmer the Rice: Once boiling, reduce the heat to low and let the rice simmer for about 15 minutes. Avoid lifting the lid during this time to ensure even cooking.
5. Rest the Rice: After 15 minutes, turn off the heat and let the rice sit, covered, for an additional 10 minutes. This allows the rice to fully absorb the remaining moisture.
6. Prepare the Vinegar Mixture: While the rice is resting, combine rice vinegar, sugar, and salt in a small saucepan. Heat the mixture over low heat until the sugar and salt dissolve completely.
7. Mix the Rice: Transfer the cooked rice to a large, shallow bowl. Gradually add the vinegar mixture while gently folding the rice with a wooden spatula. Be careful not to crush the grains.
Perfecting Your Sushi Rice
Adjusting Flavors
Depending on your taste preferences, you can adjust the amount of vinegar, sugar, and salt to create the perfect balance. Experiment with these ingredients to find the flavor profile that best suits your palate.
Getting the Right Texture
Achieving the ideal texture for sushi rice requires practice. The rice should be sticky enough to hold together but not mushy. With time and experience, you’ll become a master at creating sushi rice with the perfect texture.
Common Mistakes to Avoid
Overcooking the Rice
One of the most common mistakes is overcooking the rice. This can result in a mushy texture that is difficult to work with. To avoid this, be sure to follow the cooking times and temperatures closely.
Using the Wrong Type of Rice
It’s crucial to use short-grain rice specifically designed for sushi. Long-grain rice will not provide the necessary stickiness and texture needed for sushi.
Enhancing Your Sushi Experience
Investing in Quality Ingredients
For the best results, invest in high-quality rice and vinegar. These ingredients make a significant difference in the final taste and texture of your sushi rice.
Exploring Different Sushi Variations
Once you’ve mastered the art of making non-stick pot sushi rice, try experimenting with different types of sushi, such as nigiri, maki, and temaki. Each variation offers a unique sushi experience that you can enjoy with your perfectly cooked rice.

FAQs
Can I use a regular pot instead of a non-stick pot?
Yes, you can use a regular pot, but keep in mind that a non-stick pot makes the process easier and reduces the risk of rice sticking.
How can I prevent my sushi rice from being too sticky?
Ensure you rinse the rice thoroughly before cooking and avoid adding too much water. Balancing the vinegar mixture also helps control stickiness.
What if I don’t have rice vinegar?
If you don’t have rice vinegar, you can use a mixture of white vinegar and sugar as a substitute, though the flavor might differ slightly.
For more information on perfect short-grain white rice, visit this link.
For further exploration, you can check out our Sushi Rice Pudding Dessert or learn about the Origin of Sushi Rice.
This article contains affiliate links. We may earn a commission at no extra cost to you.


