by
by Crafting the perfect sushi rice is an art that requires attention to detail and a love for precision. For sushi enthusiasts, understanding the steps to perfect sushi rice is crucial in creating dishes that are both visually stunning and delicious. This guide will walk you through each step, ensuring your sushi rice is impeccable every time.

Understanding the Basics of Sushi Rice
Before diving into the steps to perfect sushi rice, it’s essential to understand the fundamentals. Sushi rice, known as shari or sumeshi in Japanese, is made using a specific type of short-grain rice. This rice is known for its stickiness and ability to absorb flavors, making it ideal for sushi.
The Importance of Short-Grain Rice
Short-grain rice is pivotal in sushi preparation due to its unique texture. Unlike long-grain rice, which is dry and separates easily, short-grain rice is sticky and clumps together, perfect for molding into sushi shapes. To learn more about the different rice types, visit short-grain rice basics.
Essential Tools for Making Sushi Rice
To achieve the perfect sushi rice, certain tools are indispensable. These include a rice cooker, a wooden spatula, and a hangiri, a wooden tub used for mixing the rice with vinegar. For more on these tools, check out our guide on sushi rice thermometer use.
Choosing the Right Rice Cooker
A reliable rice cooker can make all the difference in your sushi rice preparation. It ensures even cooking and helps maintain the rice’s texture. Look for a model with a sushi rice setting for best results.
Steps to Prepare Perfect Sushi Rice
Step 1: Rinse the Rice
The first step in preparing sushi rice is rinsing the rice thoroughly. This removes excess starch, preventing the rice from becoming too sticky. Rinse the rice under cold water until the water runs clear.
Step 2: Measure and Cook
Accurate measurement is key. Use a 1:1 ratio of rice to water for cooking. Place the rinsed rice and water into the rice cooker and set it to the sushi rice setting.
Step 3: Prepare the Vinegar Mixture
While the rice cooks, prepare the vinegar mixture. Combine rice vinegar, sugar, and salt in a small saucepan. Heat gently until the sugar and salt dissolve.
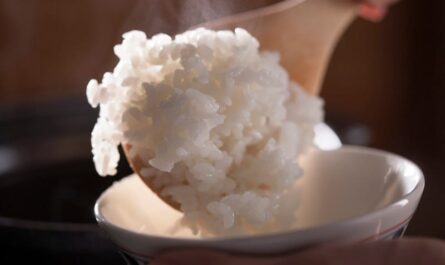
Step 4: Mix the Rice
Once the rice is cooked, transfer it to the hangiri. Pour the vinegar mixture over the rice and use a wooden spatula to mix it gently. Be careful not to mash the grains. To explore the differences between rice types, see sushi rice vs medium grain.
Step 5: Cool the Rice
Allow the rice to cool to room temperature before using it for sushi. This step is crucial for achieving the right texture and flavor.
Common Mistakes to Avoid
Even seasoned chefs can make mistakes when preparing sushi rice. Avoid these common errors to ensure your rice is perfect every time.
Overcooking the Rice
Overcooking can lead to mushy rice, which is unsuitable for sushi. Always use a rice cooker with a sushi setting to avoid this issue.
Incorrect Vinegar Mixture
The balance of vinegar, sugar, and salt is critical. Too much or too little of each can drastically affect the flavor of your sushi rice.

Frequently Asked Questions
What type of rice is best for sushi?
Short-grain rice is ideal for sushi due to its sticky texture.
Can I use a regular pot instead of a rice cooker?
While possible, a rice cooker ensures even cooking and is recommended.
Why is my sushi rice too sticky?
Excessive starch or overcooking can cause the rice to become overly sticky. Ensure proper rinsing and use the correct water ratio.
Creating perfect sushi rice requires patience and practice. By following these steps and avoiding common pitfalls, you’ll be well on your way to mastering the art of sushi rice preparation. For additional tips and recipes, visit Rice Types 101.
This article contains affiliate links. We may earn a commission at no extra cost to you.