Are you ready to embark on a culinary adventure with the perfect veggie sushi recipe? This comprehensive guide will take you through each intricate step to create delightful and colorful veggie sushi that your taste buds will thank you for. From selecting the freshest vegetables to mastering the sushi roll, this article will make sure you become a veggie sushi pro in no time. We’ve also included everything you need to know about the essential tools and ingredients required. Let’s dive in!

The Art of Veggie Sushi
Sushi making might seem daunting at first, but once you master the basics, it can become a creative and enjoyable cooking activity. Veggie sushi is not just a treat for vegetarians but a wonderful way to incorporate more vegetables into your diet. You’ll enjoy a symphony of flavors and textures from the freshest produce rolled into perfect sushi. The key to a great veggie sushi recipe lies in the quality of ingredients and the technique of rolling and slicing the sushi.
Essential Tools for Making Veggie Sushi
Before diving into the vegetarian sushi recipes, ensure you have the essential tools on hand:
Ingredients for Veggie Sushi
- 2 cups Sushi Rice
- 2 1/2 cups Water
- 1/4 cup Rice Vinegar
- 2 tbsp Sugar
- 1 tbsp Salt
- 4 sheets Nori (seaweed)
- 1 Avocado, sliced
- 1 Cucumber, julienned
- 1 Carrot, julienned
- 1 Bell Pepper, thinly sliced
- Pickled Ginger (optional)
- Wasabi and Soy Sauce (for serving)
Step-by-Step Guide to Making Veggie Sushi
1. Preparing the Sushi Rice
The base of any good sushi is its rice, and for this vegetable sushi recipe, perfectly cooked rice is essential. Here’s how to prepare it:
Start by rinsing the sushi rice in a strainer under cold water until the water runs clear. This step is crucial to remove excess starch, which can make your sushi rice too sticky. Once rinsed, place the rice into a rice cooker with the appropriate amount of water (generally, a 1:1.25 ratio of rice to water works best). Once cooked, let the rice sit for about 10 minutes before transferring it to a large mixing bowl. In a separate small bowl, mix the rice vinegar, sugar, and salt. Heat the mixture in the microwave for a few seconds until the sugar and salt dissolve completely. Now, gently fold this seasoned vinegar into the warm cooked rice. Be careful not to mash the rice. Leave the rice to cool to room temperature before proceeding.
2. Prepping the Vegetables
The choice of vegetables is paramount to achieving a delectable veggie sushi. For this recipe, we’re using crisp, fresh vegetables to deliver a burst of flavor and texture. The most commonly used vegetables for veggie sushi are cucumbers, carrots, bell peppers, and avocados. However, feel free to get creative and add any veggies you like. Wash and peel (if necessary) all your vegetables. Using a sushi knife on a sturdy cutting board, carefully julienne the cucumbers and carrots, and slice the bell pepper thinly. The avocado should be sliced lengthwise, creating thin, uniform pieces. Having all your vegetables prepped and ready will make the rolling process much smoother.
3. Rolling the Sushi
The art of rolling sushi can seem intimidating, but with practice, you’ll get the hang of it. A sushi rolling mat (included in most sushi making kits) will be indispensable in this step:
Place a sheet of nori, shiny side down, on the rolling mat. Wet your hands with a mixture of water and rice vinegar to prevent the rice from sticking. Take a handful of the seasoned sushi rice and spread it evenly over the nori, leaving a one-inch border at the top edge. Lay a few slices of each vegetable along the rice at the edge closest to you. Lift the mat closest to you and begin rolling the sushi away from you while applying a consistent, gentle pressure. The goal is to keep the roll tight but not so tight that the ingredients are squished out. Wet the top border of the nori with a bit of water to seal the roll. Repeat the process with the remaining ingredients.
4. Slicing the Veggie Sushi
Once youve rolled your sushi, its time to slice it into bite-sized pieces. For the cleanest cuts, make sure your sushi knife is very sharp. If your knife gets sticky, keep a damp cloth nearby to wipe it clean between cuts:
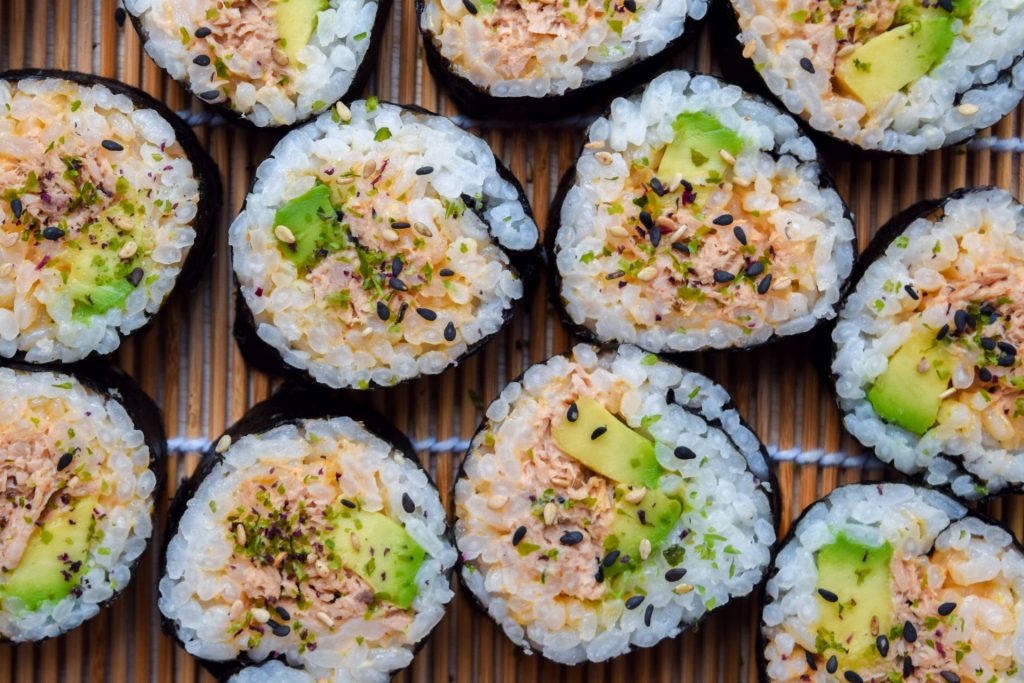
Using a sushi knife, carefully slice the sushi roll into six to eight equal pieces. Use gentle sawing motions rather than pressing straight down to avoid crushing the roll. Arrange the sushi pieces neatly on a platter, and they are ready to serve.
5. Serving Your Veggie Sushi
Your homemade veggie sushi is now ready to be enjoyed! Serve the sushi with a side of wasabi, soy sauce, and pickled ginger. These condiments not only enhance the flavors but also cleanse the palate between bites. Arrange the sushi on a serving platter with care, creating an inviting and visually appealing presentation. You can also sprinkle some sesame seeds on top for extra flavor and texture. Whether its for a casual family dinner or an elegant party appetizer, veggie sushi is bound to impress and delight. If you’re looking for other exciting sushi adventures, check out our guides to the Hawaiian Roll Sushi, the Volcano Roll, or the Deep Fried Sushi Roll.
6. Cleaning Up
After a fun sushi-making session, cleaning up is the next step. Proper maintenance of your sushi tools will ensure they last a long time and stay in good condition:
Be sure to give your rice cooker, cutting board, sushi knife, and other tools a good wash with warm, soapy water. For your cutting board, consider using a cutting board oil to keep it in top condition. Likewise, using a cookware cleaner will help maintain the quality of your essential sushi-making tools.
As an Amazon Associate, I earn from qualifying purchases.
With this comprehensive guide, you now have all the tools and knowledge you need to create stunning and delicious veggie sushi at home. Enjoy exploring different vegetable combinations and indulging in the rich layers of flavor and texture that this dish offers. Happy sushi making, and happy eating!


